

Installing drywall, also known as sheetrock or gypsum board, is an extremely common task in home construction and renovation projects. Here’s a step-by-step guide to help you with the process:
Note: It’s important to wear appropriate safety gear such as goggles, a dust mask, and gloves when working with drywall. You do not want to get drywall in your eyes or lungs. Not good at all.
1. Gather the necessary tools and materials:
– Drywall sheets (standard sizes are 4′ x 8′ or 4′ x 12′)
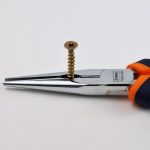
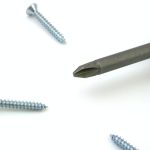
– Drywall screws (1 1/4″ or 1 5/8″ in length)
– Screw gun or power drill
– T-square or straightedge
– Utility knife
– Drywall saw or keyhole saw
– Measuring tape
– Drywall rasp or sanding block
– Joint compound
– Drywall tape
– Corner beads (if needed)
– Joint knives (6″ and 12″)
– Sandpaper (medium and fine grit)
– Dust mask, goggles, and gloves
2. Prepare the workspace:
– Clear the area where you’ll be installing the drywall.
– Ensure the framing or wall studs are clean, straight, and free from protruding nails.
3. Measure and cut the drywall:
– Measure the height and width of the wall section you’re covering.
– Transfer the measurements to the drywall sheet and mark the cutting line using a T-square or straightedge.
– Score the front paper surface of the drywall along the cutting line using a utility knife.
– Bend the scored drywall sheet gently to break it along the scored line.
– Cut through the remaining paper layer from the backside using a utility knife or drywall saw.
4. Install the drywall:
– Position the first drywall sheet against the wall, leaving a small gap (about 1/4″) at the bottom to allow for expansion.
– Using a screw gun or power drill, insert drywall screws into the drywall, spacing them every 12-16 inches along the studs. Sink the screws slightly below the surface without breaking the paper.
– Repeat the process for the remaining sheets, ensuring a 1/8″ gap between each sheet for expansion.
5. Cut openings for outlets, switches, and fixtures:
– Measure and mark the location of the openings on the drywall.
– Use a drywall saw or keyhole saw to carefully cut out the openings.
– Install outlet and switch boxes before continuing with the remaining steps.
6. Apply joint compound and tape:
– Apply a thin layer of joint compound along the joints between drywall sheets using a 6″ joint knife.
– Embed drywall tape into the wet compound, pressing it gently with the joint knife to remove air bubbles and ensure a smooth finish.
– Allow the first layer of joint compound to dry according to the manufacturer’s instructions.
7. Apply additional coats of joint compound:
– Apply a second coat of joint compound, widening the layer to cover the tape by about 6-8 inches on each side.
– Feather the edges of the compound to create a smooth transition.
– Allow the second coat to dry and repeat the process with a third coat if necessary.
8. Sand and finish:
– Once the joint compound is completely dry, use a drywall rasp or sanding block to smooth any rough edges or imperfections.
– Start with medium-grit sandpaper and progress to fine-grit for a smoother finish.
– Clean the dust from the sanded surface.
9. Finish corners (if needed):
– Install corner beads on external corners using joint compound and screws or nails.
– Apply
And there you have it! You’ve just installed some drywall. Congratulations on your accomplishment! You’ll be a home improvement hero before your know it. We hope that this guide has helped you in your process. Make sure to stay tuned for more how-to articles, tips, and tricks for more of your home improvement projects. Thank you so much for reading!
